Manual · Chapter 4
Importing and the Media bin
What files DriftEdit opens, how to bring them in and keep them organised, and what to do when a file goes missing.
Everything you edit starts in the Media panel, the bin. Your files never leave your device: importing gives the browser permission to read them, and DriftEdit keeps them in the browser's own storage so they are there next time.
What you can import
- Video: MP4, MOV, WebM and MKV, in the codecs your browser decodes (H.264, HEVC where the device supports it, VP9, AV1). Phone footage, screen recordings and camera files all work.
- Photos: JPEG, PNG, WebP and HEIC where the browser reads it. Animated GIFs play and loop.
- Sound: MP3, M4A, AAC, WAV, OGG and FLAC.
- Captions: SRT and WebVTT files (they go to the Captions panel).
- 3D models: glTF, OBJ, FBX, USD, STL, 3MF, Blender and DriftEngine's
.drft, or a.zipof a model with its textures (see Overlays, 3D and the Library).
Bringing files in
- Press Import in the Media panel and choose the files, or
- drag files from a folder and drop them anywhere on the studio, or
- drop them straight onto the timeline, where they land at the point you drop them.
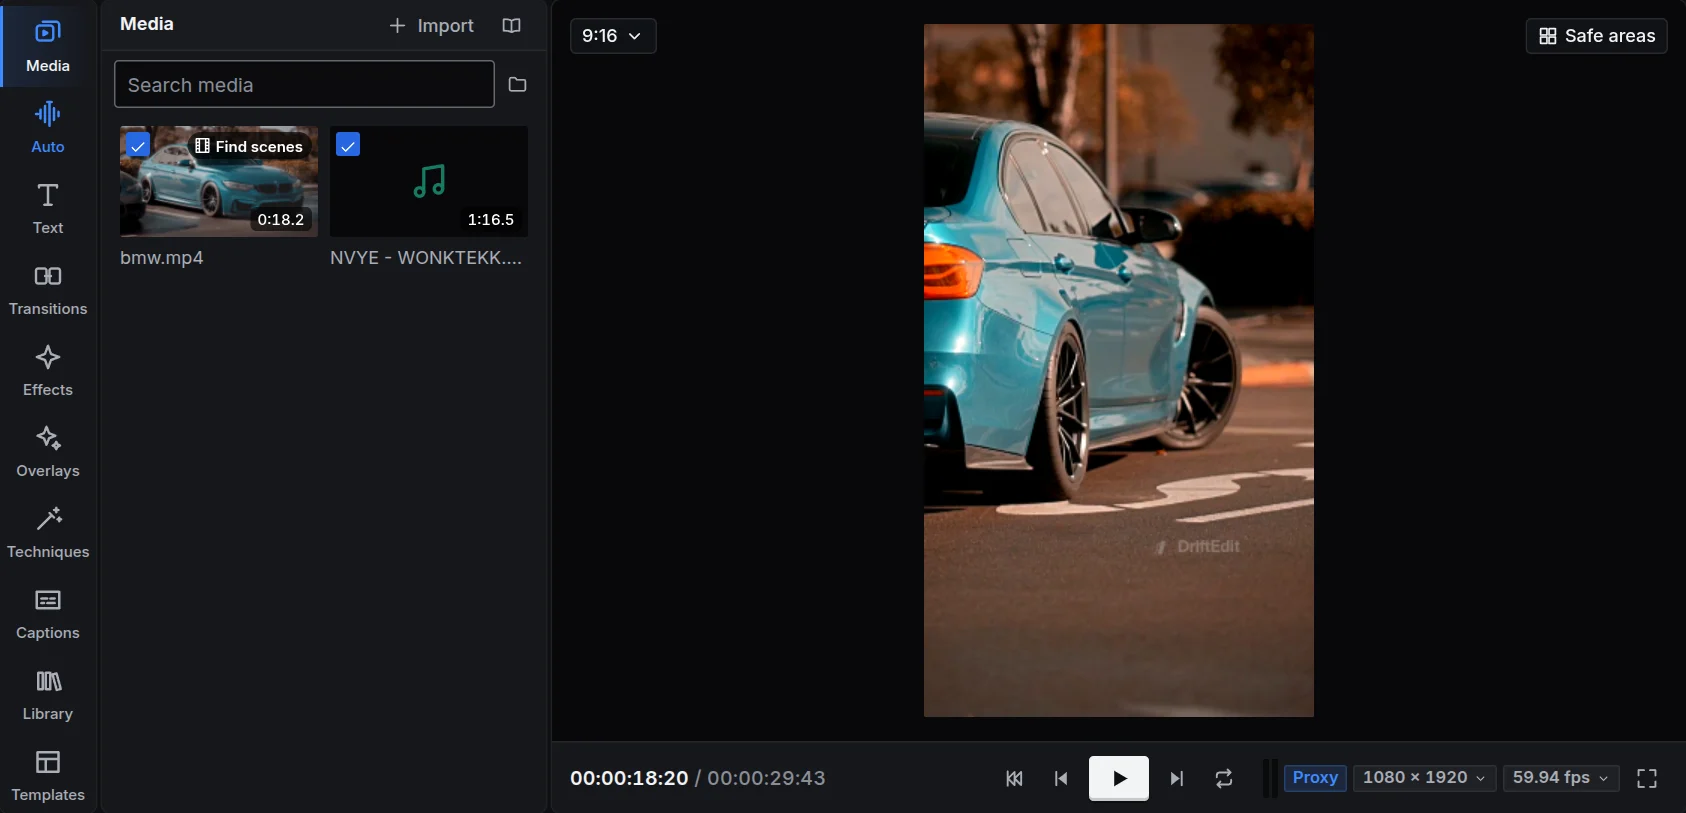
While a file is read, its tile shows the progress. A lighter copy of each video is made in the background for smooth playback (the proxy); you can edit straight away.
Recording the screen, a camera or a voice
Press the red dot in the Media panel, or File, Record screen, camera or voice, to open the Record window, and turn on what to record, any of them at once:
- Screen: press Choose what to share and pick the whole screen, a window or a browser tab in the browser's own window. Its sound records a tab's sound, or the whole computer's where the browser offers it.
- Camera and Microphone: choose the device. The bar under the microphone shows its level; Reduce noise and echo uses the browser's own cleaning.
- Frame rate: video keeps its own size and as many frames a second as the source gives, up to 120, 60 or 30. A screen records as fast as the display refreshes.
- Count down from 3, Play the edit while recording (for a voice-over; headphones keep the edit out of the microphone) and Captions from the voice, made when it stops, each word timed to the voice. Choose the Language spoken, or let it be detected, and whether the spoken word is lit.
The camera and microphone chosen are kept for next time; when the one chosen is not there (a linked phone not linked now, a camera unplugged), this device's own is used, and the window says so.
Press Record and the window steps aside (the time in the bar at the top opens it again). While it records, it grows in red on the timeline with its waveform, on the rows it will land on, and a bar at the top of the studio shows the time with Pause, Stop and Discard. A pause leaves no gap. Stop puts each source on the timeline as its own clip, in sync, from the playhead where it started: the screen with its sound under it, the camera above it as a picture in the bottom-right corner, the voice on a row named Voice. It is one step to undo. Discard deletes the recording and the rows made for it. While it records, Export and what would leave the page wait until it stops: opening or making a project, opening a project file, changing the language. It lands in the sequence it started in, even if you open another one meanwhile. Editing and playback wait as well: the menus' items, the buttons under the viewer and over the timeline, and the panels that edit are greyed out and take no press until it stops. Zooming, the manual and saving stay.
Recordings are written to the browser's storage as they record and never leave the device. If the tab closes mid-recording, what was recorded comes back where it was recording the next time the project opens. Phones' browsers cannot record the screen; the camera and microphone work.
A teleprompter while you record
In the Record window's Teleprompter tab, type or paste your script, or Import a text, Markdown, SRT or WebVTT file (captions keep their words and speakers, not their timing). Words in [brackets] are cues: shown, not read. With Show while recording on, the script shows over the preview from the countdown and scrolls once the recording starts. It is never part of the recording.
- Scrolls: At a speed, in words a minute, with how long the script takes to read; or With my voice, following what you say word by word, heard by the speech model on this device, and holding while you pause. It hears the language set for the recording, the one Captions from the voice uses, and the speech model loads as soon as you choose it, so it follows from your first word; Record waits for it.
- Look: the font, the text and outline colours, the size, the background, where it sits (centre, top, bottom, left or right), its width and height, the reading line, mirrored for a prompter glass or upside down.
- While it shows, a bar under the recording's has Pause, a line back and forward, slower and faster, and Pop out: a window of its own, always on top, to put under the camera. Press any word to start again from there. Try it shows it without recording.
Another device as a camera
In the Record window, under Camera, Add a device shows a QR code and an address. Any phone, tablet or computer with a camera can be linked: on the same Wi-Fi, scan the code with its camera or open the address in its browser, with no app and no account. Once linked, the device is among the cameras, its picture in the preview, and its microphone among the microphones. On the device, choose which of its cameras and microphones it uses; in the studio, Switch camera turns to its next one, such as a phone's other side. The teleprompter shows on its screen too, full size over its picture: tap it to pause, swipe down to go back a line.
While you record, the device records its own copy at full quality, kept in its own storage as it goes. When you stop, the clip lands at once from the picture sent over the network; then the device sends its own file, with its progress shown, and that file takes its place with every frame its camera gave. It is placed in sync by its sound against a sound recorded here (the microphone, the screen's), or else by the two devices' clocks. Keep the device's page open and its screen on while recording. Unlink ends the link.
The device can start the recording too: once the studio's Record window is open and ready, the round Record button at the foot of the device's screen starts it, with the countdown when it is on; then Pause and Stop are there. Until the window is ready, the device says so under the button. A device that cannot record in its best form tries the next one, and the studio says why when none works.
Drawing an image
Press the brush in the Media panel, or File, Draw an image, to paint a picture at the edit's own size: a Brush in any Colour and Size (a pen's pressure sets its width), the Eraser, Undo and Clear. The Background is None, so the footage shows through, or A colour. Add to the edit puts it in the media as a PNG and on the timeline at the playhead, on the top row over the other clips.
Working with the bin
- Preview: hover over a video's tile to scrub through it.
- Add to the timeline: drag a tile onto a track, or double-click it to place it at the playhead.
- Folders: right-click the bin to make a folder, and drag tiles into it.
- Search: type in the search box to find a file by name.
- Find scenes: on a video's tile, finds the scenes inside it. Each scene becomes a tile of its own to drag onto the timeline or to pick for auto mode. A picture model does it on your device; the first time, it downloads once.
- Use in the edit: in the Auto panel's footage list, switch a video or photo off to leave it out of auto edits, without removing it from the project.
- Pick several: Ctrl-click (Cmd on a Mac) adds a file, Shift-click picks a run of them, or drag a box across the empty space. Right-click one of them to add them all to the timeline, remove them, or move them to a folder.
Choosing the parts of a video
A long video often has only a few good moments. In the Auto panel, each video in the footage list has a strip of its frames: click it, or press Choose parts, to open Parts of the footage. Drag across a video to pick a stretch, as many as you like, or press a scene to pick it. Auto mode only uses the stretches you picked. The list of parts under the video can be played one by one, or removed.
Removing a file
Right-click a tile and choose Remove from the project. It is offered when nothing in the project uses the file, the clips on the timeline included. Things made from a file, such as a song's stems or a cleaned voice, are removed with it when nothing uses them either.
When a file goes missing
Clearing the browser's data, or opening a project on another device, leaves the edit without its files. The clips stay where they are and show as missing.
- Import the same file again: DriftEdit recognises it and every clip that uses it comes back.
- Or choose Find the file on the missing tile and pick it.
Storage
The browser gives each site a share of the device's free space. Long 4K videos use a lot of it. If the studio says storage is full, remove videos you no longer use, or free space on the device.