Manual · Chapter 3
The studio at a glance
The five areas of the studio, what each one is for, and how the same editor looks on a phone.
The studio has five areas. Once you know them, every other chapter is easy to follow.
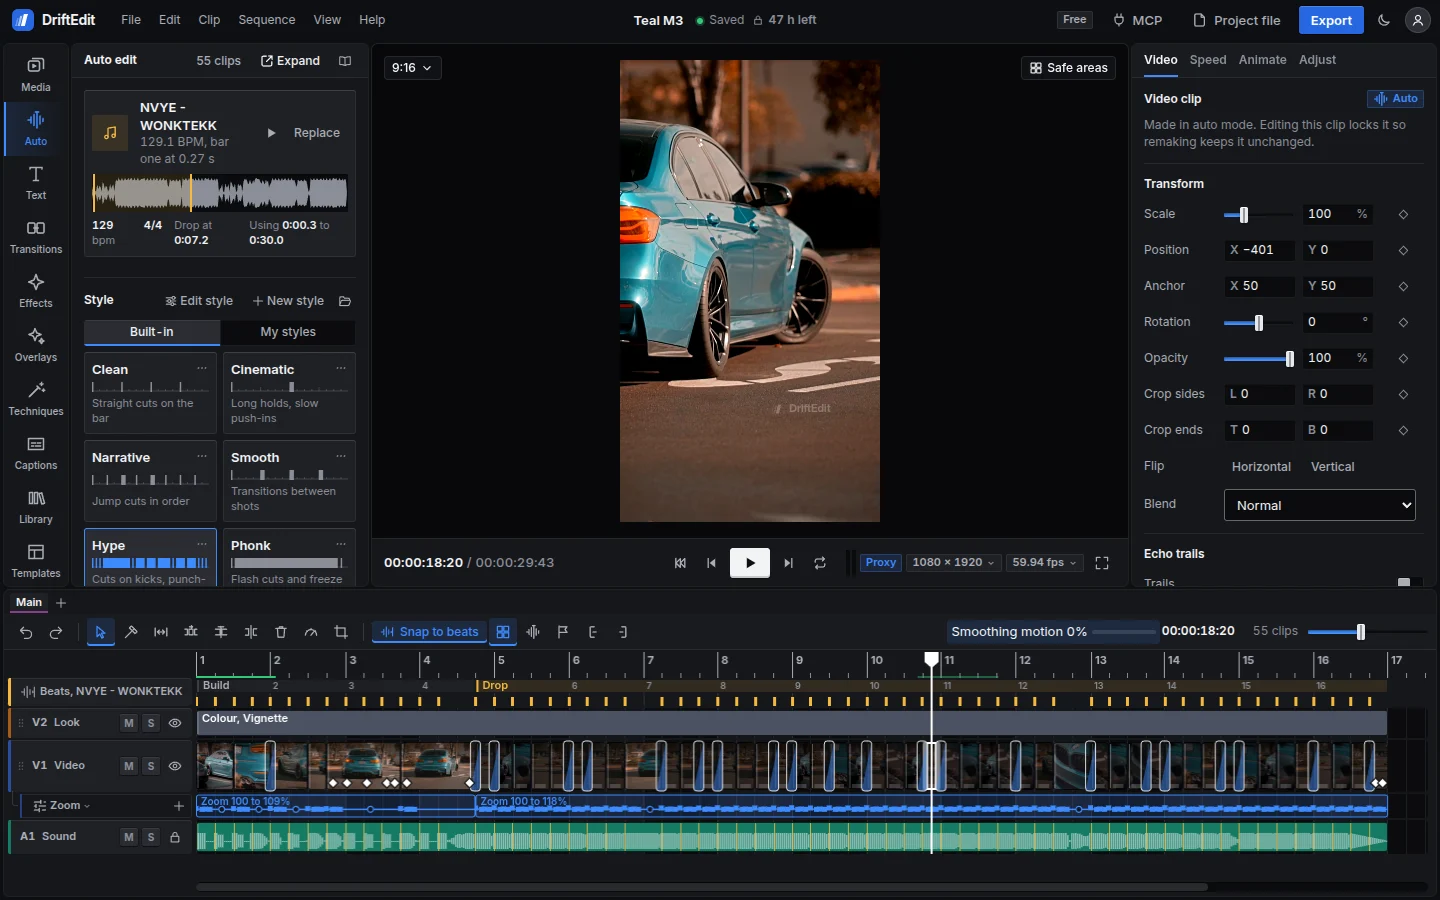
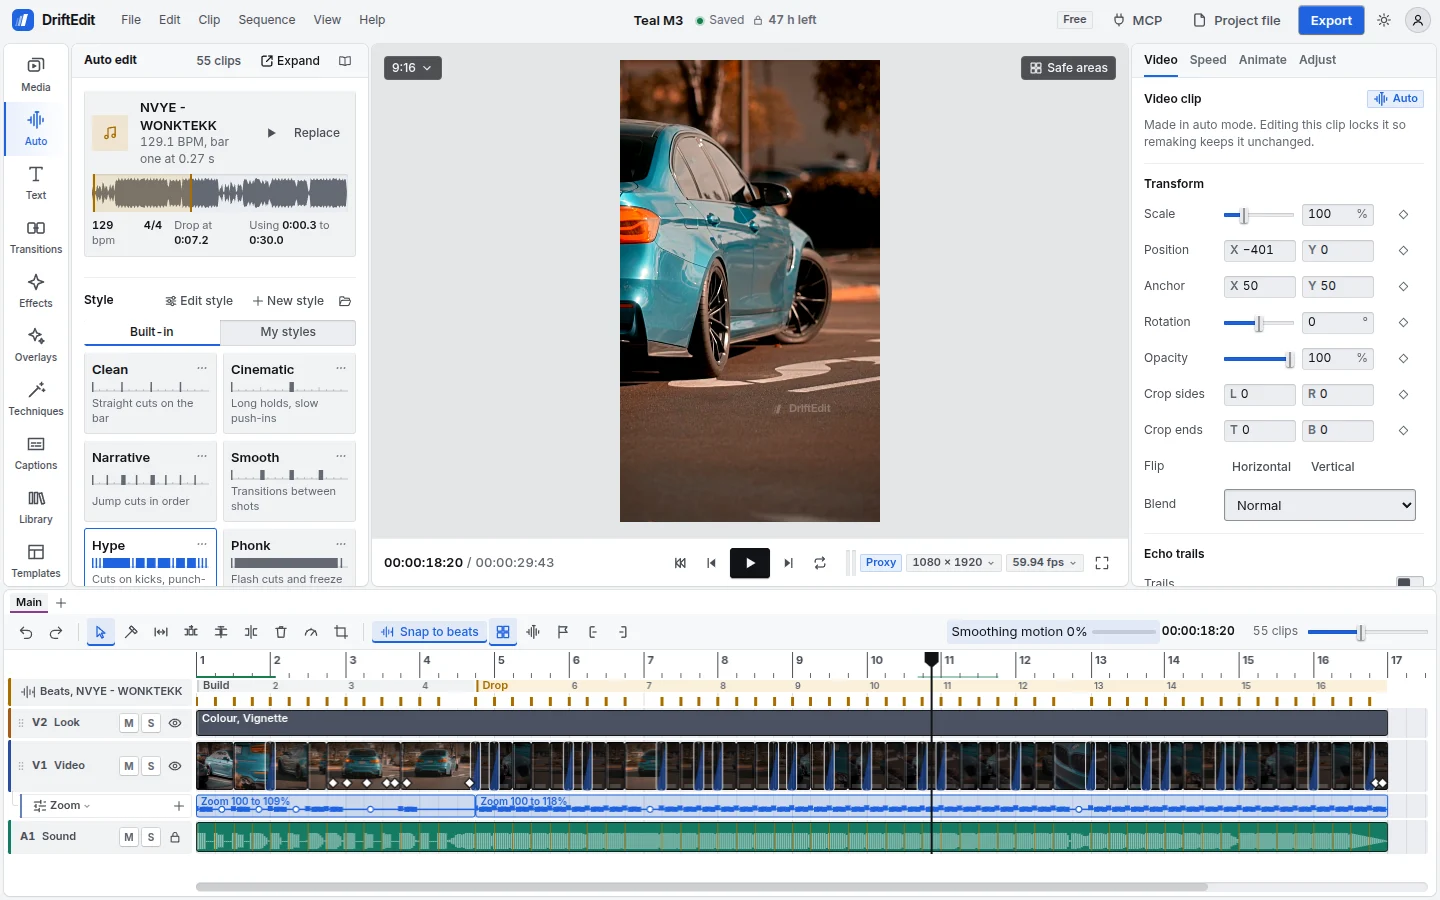
The top bar
Along the top, from left to right:
- The menus: File, Edit, Clip, Sequence, View and Help. Every command in the studio is in one of them, with its key beside it.
- The project's name. Click it to rename the project. Beside it, Saved says your work is stored on this device; it saves by itself as you work.
- The plan: Free or Pro. On the free plan, the time before the project locks is shown here (see Projects, files and your account).
- MCP: connects an AI agent to the studio (see Working with an AI agent).
- Project file: saves the project as a file, or opens one.
- Export: makes the finished video.
- The theme (System, Dark, Light or High contrast) and your account.
The panels on the left
A column of icons, the rail, opens one panel at a time, in the order work usually goes:
| Panel | What it holds |
|---|---|
| Media | Your imported videos, photos and songs, in folders. |
| Auto | Auto mode: a song, a style and a length make an edit. |
| Text | Text styles and animations for titles. |
| Transitions | Transitions to put on a cut between two clips. |
| Effects | Effects and looks for a clip, and the VFX. |
| Overlays | Light leaks, grain, frames, 3D scenes and overlays of your own. |
| Techniques | An editor's moves applied in one press, and still frames. |
| Captions | Captions from speech or a file, their style, and an AI voice. |
| Library | Sound effects, beats and stickers, free to use. |
| Templates | Ready edits with places for your own clips. |
Most of what a panel holds works the same way: click it to apply it to what is selected, or drag it onto the timeline. An effect goes on a clip, a transition on a cut, a text style makes a title, and a template opens a window where you choose what fills it.
The viewer
In the middle, the picture at the playhead. Under it:
- Play, and the buttons to step a frame or a beat back and forward. Space plays and pauses.
- Loop: plays the part between the in and out points again and again.
- Proxy: playback uses a lighter copy of each video so it stays smooth; the full picture is shown whenever you pause. Turn it off to play the original.
- The project's size and frame rate, to change them.
Above it, the shape of the video (16:9, 9:16, 4:5, 1:1) and Safe areas, which shows where a phone app's buttons and captions would cover the picture.
Click a picture, a title or an overlay in the viewer to choose it, then drag it to move it, drag its corners to scale it, or turn it from its handle. On a phone, use two fingers.
The inspector
On the right, everything about what is selected: a clip's position, scale, rotation, opacity, crop and blend in Video (and a title's words and look, under Text); its speed in Speed; its keyframes in Animate; its effects in Adjust; its sound in Audio. Select a sound track's head and the inspector shows the track's EQ.
A slider's value sits in a field beside it: click the field to type a value, or drag it sideways (Shift for ten times as far, Alt for a tenth). The same goes for the sliders in the style editor, the teleprompter, Draw and the other windows.
Every value with a diamond beside it can change over time: see Keyframes, speed and motion.
The timeline
At the bottom, the edit itself: tracks of pictures, sound and text, left to right in time. The ruler along the top shows time, or the song's bars when its beats are known; the white line is the playhead. The toolbar above holds the tools, snapping, markers, the in and out points and the zoom. The timeline explains all of it.
On a phone
The same studio, arranged for touch: the viewer at the top, the timeline below it, and a bar of actions at the bottom that opens the panels and the inspector as sheets. Long-press anything for its menu, pinch the timeline to zoom it, and drag the ruler to scroll.